Pages

Pages

Tuesday, 19 May 2015

Growing with goats: How to build a goat-proof herb bed

I’ve been catching the train into London quite a bit recently for work.  In theory the journey could provide around 45 minutes of working time, meaning that I could leave that little bit earlier.  In practice, it’s difficult to type when standing up in the isle of a muggy, overcrowded train, particularly when the man next to you insists on shouting into his mobile every time the reception drops out- which is about every 2 minutes.  Possibly he thought that mobile phones work in the same was as two paper cups joined by a piece of string, and that distance can be overcome by raising his voice?

So what I’ve mainly been doing is staring out of the window at the sunshine, while wishing the train would turn the heating off. 

Not a smallholding...
On one journey I started thinking about how we could grow some crops in our garden.  A garden occupied by two goats, occasionally a rabbit, and currently seven chickens many of whom like to eat, taste or stamp all over plants, as evidenced in particular by the bare stripe that runs all along the bushes to a height of around 1.5 metres.  A project worthy of at least 45 minutes train musing!

My thoughts eventually coalesced into making a cold frame, something that would act as a mini greenhouse to get the seeds started, (we have shutters in our house that don't leave any space for seeds on the windowsill), and then could be covered in chicken wire to keep out the various animals once summer arrived. 

A few day's later I was walking the back way to the supermarket so that I could carry out my usual nonchalant glance into the bins (I have collected a lot of broken-but-fixable stuff this way, including the jar we used for brewing dandelion and ginger ale).  Propped up next to the bin were six large sheets of thick plastic, perfect for a cold frame!  I took it as a sign, although after the three slow trips it took to transport all the (unexpectedly heavy and slightly-too-large-to-be-carried-comfortably)sheets from the bin to my house, my enthusiasm had taken a bit of a battering.


Week 1
I returned to the project at the weekend with a spot of amateur brick-laying.  Amateur in the sense that I watched half You Tube video in bed and then decided to jump straight in (although I did at least get dressed).  We had already fished out a surprising number of bricks from various muddy mounds in the garden, which we think were once the previous owners' attempts at a rockery, so I used these side-on to build a cold frame that was about 2m by 0.5m and two bricks high.  As this didn't leave a lot of room for plants to grow, I also laid an old fence post across the back to raise the height, which added to the recycling element of this project and also gave the overall structure a pleasing cold frame shape.

Sibelius demonstrates the successful goat proofing
We planted whatever we had at the time, namely a multipack of herbs (dill, basil, sage, oregano, chives) and a pack of cut-and-come-again mixed lettuce.  Goodness knows how long we had had these but it was evidently long enough for almost all the herb seeds to fail.  Apart from the dill, which has grown tremendously, we have a total of two basil plants and three sage.  I also learnt that my plant identification skills are really poor and I can't tell the difference between the seedling of a weed and the desired plant. Luckily, my sense of smell is better than my eyesight and once the seedlings had unfurled their first proper leaves I was able to gently rub them to identify out the usurpers from the incumbents. 

The cut and come again lettuce also flourished, and, after Sibelius managed to get his head in under the plastic to carry out the first 'cut', proved true to its name by growing again.

Unfortunately the original plan of replacing the plastic with chicken wire as soon as the weather improved had to be revised because the goats quickly realised that by standing on the chicken wire their combined weight depressed it enough to get a hold on the leaves and yank them them up through the holes.  I've no idea if this teamwork was conscious or accidental, but I do hope they never apply it to breaking into our kitchen! I've kept the chicken wire in place, because it adds extra height for the plants to grow, and replaced the plastic over the top of it.  I just need to keep it watered a bit more often as the rain can't get in, but at least the plants should be nice and cosy - and intact!

We have now harvested our first lettuce crop, (although I acknowledge that 'crop' is possibly too strong a term for something this easy to grow), and apart from a few strange-tasting leaves which I subsequently decided were probably weeds, it was delicious. 
 
The dill is ready to be harvested as soon as we want it - I'm thinking a weekend breakfast with our scrambled eggs from Hempsal's community farm, and I've planted more dill seeds in the empty spaces left by our failed chives.
 
And the leftover plastic sheets were made into a rain shelter by the back door for the boys.


Sunday, 10 May 2015

Hatching our dinner...


Spatchcock
I think it started with a conversation about turkeys.  I love turkey at Christmas, but with just the two of us for the last few years our Christmas dinners have tended towards the vegetarian - it's just easier to cater for fewer people that way (and just as tasty!).  However, after spotting that one of the farm shops just outside Cambridge was advertising (prohibitively expensive) turkeys that had been bought to the farm as young poults and raised on site, I wondered if we could do the same.  Surely it would be far more satisfying to know that the animal we were eating had been given a full and happy life, rather than some ethical unknown from Sainsbury's chiller section.

We decided on a trial run with chickens.  After several hours' intensive research on the internet we purchased a Brinsea mini advance ex incubator; an all-singing, all-dancing affair with automatic turning, temperature and humidity control.  We also ordered 6 hatching eggs.  The breed I selected was the Ixworth, which is primarily raised for meat and they arrived through the post in a heavily padded foam egg carton.

The internet is an amazing resource for projects like this, ranging from photographs of a candled egg taken during each of its 21 days of development to discussion forums for every aspect of housing and illness.  I spent several evenings watching You Tube videos which showed the first 'peeping' noises from the unhatched eggs, which apparently stimulates the other eggs to hatch, followed by the first 'pip' as a chick breaks through the shell with its egg tooth and finally the emergence from the egg of a bedraggled chick.

We carefully bought Cambridge's most over-engineered incubator up to the correct temperature (37.5oC) and humidity (45%) and added ('set') the eggs. After 7 days we candled them to check which ones were fertile and developing.  Only one egg out of six showed the spider-like veins which are indicative of a developing embryo.  This was upsetting, not least because a single lonely chicken was not part of our overall plan for improved animal welfare; however, a friend in Cambridge had set some of her chickens' eggs into an incubator on the same day as us and promised that we could have one of her chicks as soon as they hatched.

Day 20 came and went with no peeping from our egg.  We reasoned that this could be because the egg had no fellow eggs to respond to, or maybe the incubator was unexpectedly soundproof.  Day 21 also passed without incident, then day 22.  Finally at day 24 we decided it was time to acknowledge the failure of our first attempt.  It was day 25 before I could bring myself to throw away the egg  - I had nightmares about it hatching alone in the bin.  It didn't (I checked).

Again the internet was the source of much advice.  It turns out that eggs delivered through the post, although commonplace (and I love the idea of hundreds of eggs whizzing around the country in the post), are associated with increased failure rates due to the uncertainty regarding the conditions during transit- they might have been left overnight in a freezing warehouse, or baked in a delivery van.  For our single egg which had clearly started developing but died, we could just have been unlucky as even within a 'normal' incubator hatch there can be cases of late stage death in shell.

We decided to try again, but this time using eggs from Hempsal's community farm. This would mean that we would have no control over the breed of the chickens, as the cockerels at Hempsal's are experts at hopping over the fences that separate birds of different breeds, but it would remove the uncertainty of having eggs arrive through the post.

This time 5 out of the 6 eggs were developing at 7 days.  Promising.  However, once again day 20 came and went without any signs of life.  The next morning we ate breakfast willing the eggs to do something, anything, to show that there were chicks inside, but there was nothing.  On the evening of day 21 I spoke to my parents on the way home from work and told them I thought the hatch had once again failed.  As I opened the door to our house I was already mentally planning my evening of  Google searches for 'late stage death in shell reasons', 'incubator settings eggs failing to hatch' and 'why, why, why are all my eggs dying?!'; however, when I checked the incubator one of the eggs had pipped!  Again there was no further sign of life - contrary to my You Tube videos in which this stage of hatching was often accompanied by peeping noises and vigorous egg rocking, but this was a definite improvement on last time.

First pip!
 The next morning we woke up to our first chick, damp, floppy and feigning death in the bottom of the incubator.  Like the anxious first-time chicken parents we were, we pressed our noses to the incubator to watch for breathing.  It was alive!  We had a chick!  If it hadn't been 7.30am on a Wednesday morning I swear we'd have broken out the champagne Prosecco.

First chick!
Over the next 24 hours all five eggs hatched, producing four black chicks and one yellow.  For the first few days of their tiny lives we felt the weight of responsibility for keeping them alive particularly heavily- was the heat lamp too close?  Would they drown in their ramekin of water (I actually got up during the night to check).  This was not helped by their habit of feigning death while sleeping.

Playing dead while sleeping
Amazingly, however, they survived, and thrived.  'They're developing feathers'! Ian and I called to each other in the mornings; 'They've mastered perching'! 'They're still alive!'

We mustn't get attached, Ian kept repeating, we mustn't get attached, to their cute little beaks and their tiny little wings... I was cold-hearted in my denial; of course I wasn't attached, I could eat them tomorrow if needs be (safe in the knowledge that there would be no need for a tiny chicken dinner tomorrow).

However, one week in and distinct personalities are beginning to show through.  Nugget and Supreme are the ringleaders and the bravest; the first to master perching and masters of 'bird ballet' stretching out each leg together with the adjacent wing.  Chasseur, tiny and all black, can fall asleep anywhere, including standing up with his head in the food bowl.  Provencal and Spatchcock are the adventurers, flinging themselves up at the top of the brooder, tiny wings flapping madly.

Spatchcock, Nugget, Supreme (bottom only!) and Provencal.
I'm still confident that we can kill them, when the time comes.  Not just because the cute chick stage will pass but also because naming the chicks, and caring about their welfare, as all part of the original plan for giving them the best possible life.  I'm not saying it will be easy, but it shouldn't be easy, that's all that is wrong with today's shrink-wrapped nameless supermarket chicken culture.

As for Charles Ryder, he's very grumpy about sharing his favourite spot by the log burner with the chicks. He can't wait until we eat the lot of them.  


Friday, 8 May 2015

Voting update part 2

As I was listening to Radio 4 reporting the results of the General Election earlier today; that the Conservatives, unexpectedly, have a majority government, and that Labour have lost many seats, I was reminded that Charles Ryder, our electioneering rabbit, was particularly interested in the voting process. 

I looked back at the results of his pre-election nibbling of campaign leaflets, available here: voting update, and was amazed to see that he was predicting this outcome all along- almost no nibbling of the Conservative leaflet and a total shredding of Labour!


I'm thinking of hiring Charles out for future elections; Paul the octopus has nothing on him!

P.S. Charles' powers clearly only work at the national level since in Cambridge the Lib Dem MP, Julian Huppert, (slightly chewed) lost to the Labour candidate (total shredding).

Friday, 1 May 2015

Foraging: Dandelion and ginger ale

OK so I have a confession to make; we bought the ginger (~50p for a huge root!) so the 'foraging' aspect here applies only to the dandelions, but what foraging!  The recipe calls for the entire dandelion, including the large tap root (which resembles a skinny parsnip).  In the lush dandelion plants on the farm this root tends to reach at least 15cm into the soil, which can be quite tricky to remove.  The trick we used was to slowly wriggle a fork into the (heavy clay) soil next to the plant and leaver out the entire clod of earth.  Then this can be broken open like a plaster cast to reveal the dandelion roots (and several surprised worms) within.


Tip #2 is to read the recipe first, I didn't and after collecting a huge wheelbarrow-load of dandelions at the farm - at great effort- we arrived home to find that we needed a measly 450g!


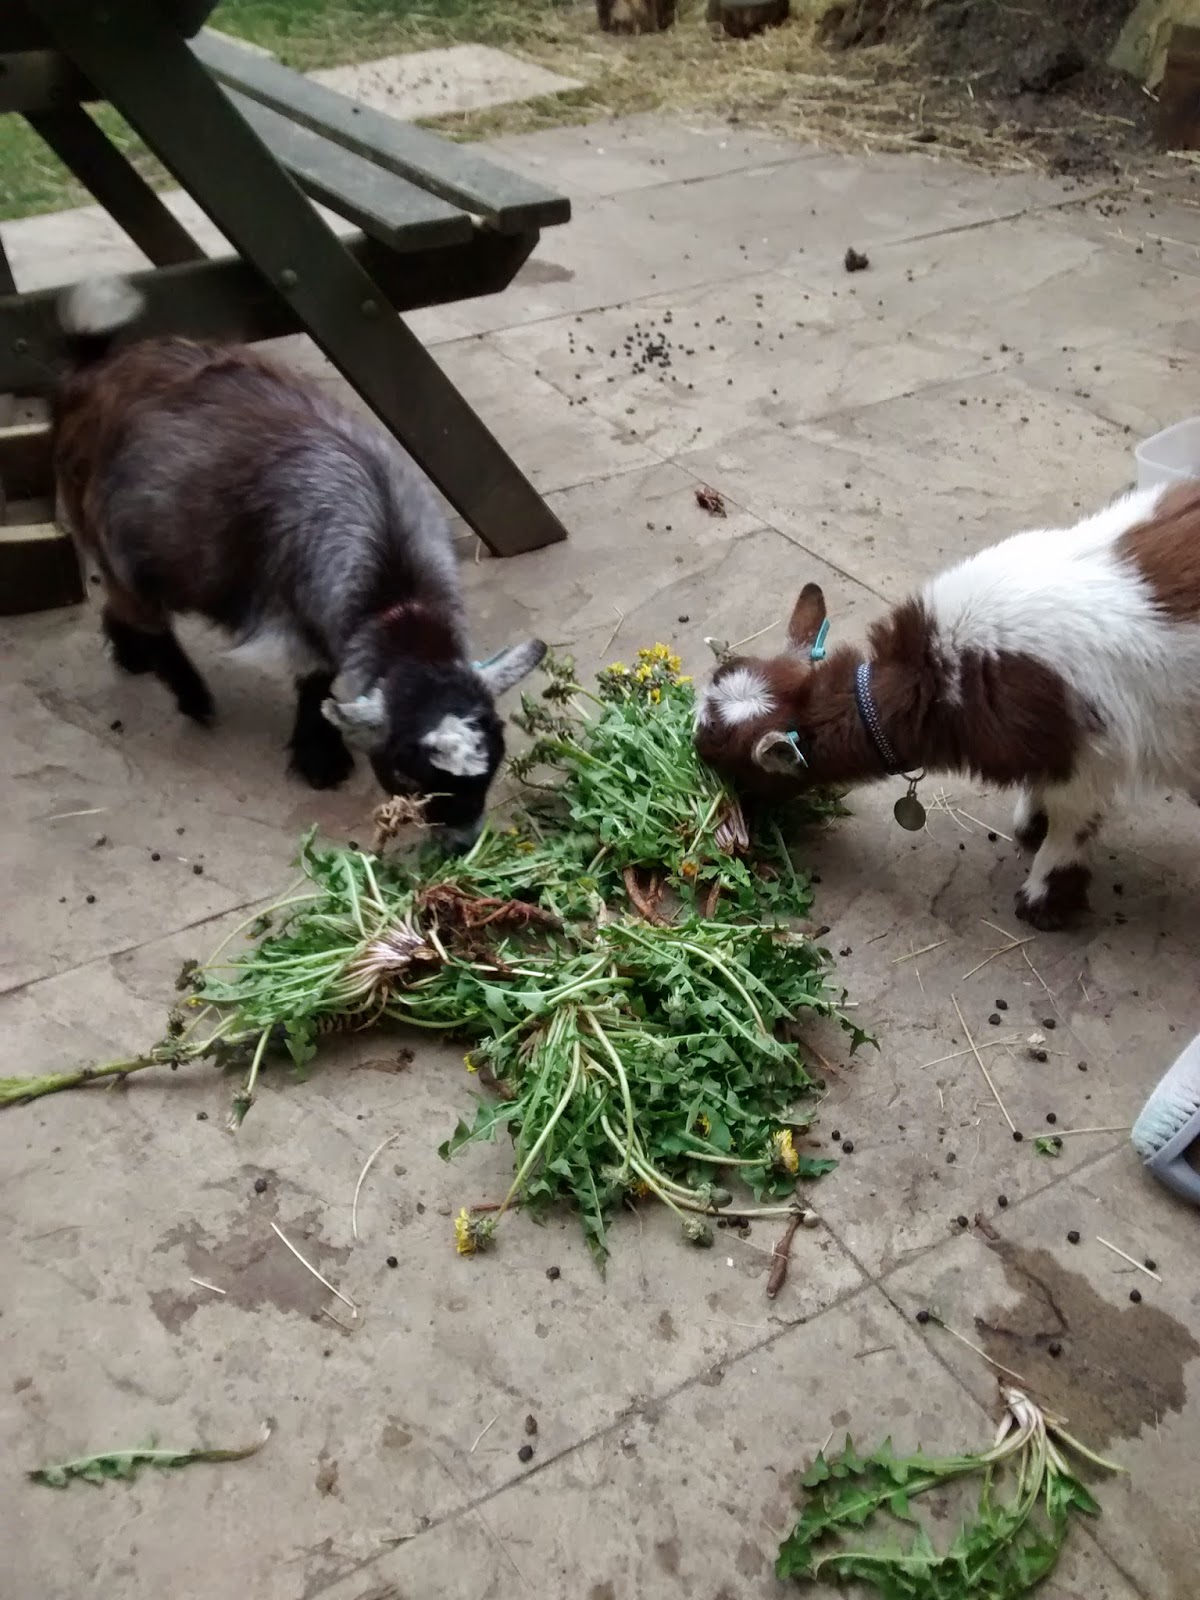
Needless to say, the (non-human) boys did well out of this mistake.


The ale needs to ferment for at least 3 days in a lidded container (it doesn't have to be airtight).  We used a glass drinks dispenser, which I found in a local skip, and which was sterilised with a Milton tablet for 15 minutes.  As we had no idea how much liquid the dispenser held, we drained out the sterilised water into a measuring jug.


The recipe itself is simple, first activate the brewing yeast in warm water with a couple of teaspoons of sugar.  While waiting for this to bubble, boil the whole dandelion plants (well-washed and checked for slugs!), roughly chopped ginger and rind of 2 lemons in a pan of water (ours held 5 pints) for 10 minutes.


Then strain the liquid into your sterilised container. We used a cheese muslin cloth for this, but any sort of fine sieve would do (the bits are all pretty large, and there is a second filtration step before drinking).  Top up the container with the remainder of the liquid (in our case, 10 pints) and the juice of 2 lemons. Add the sugar, cream of tartar and mix until dissolved.


The following tip #3 will probably be unnecessary for most people: when collecting glass objects out of skips, check for leaks before filling with liquid.  It was at this stage in the recipe that I noticed a slow drip, drip, of brown sugary liquid falling from the join between the container and the dispensing tap.  Cue 10 minutes of running around madly in the search for something to seal the leak, including the garden shed, bathroom cupboard, under stairs cupboard and back to the garden shed.  We questioned how a house that has required so many different types of silicone sealant over the past few years, can suddenly be devoid of all sealant in our time of need.  Finally, we tied our selected 'fix'  of fine PTFE tape around dispensing tap and watched like hawks for the next 5 minutes for any sign of further leakage.  Luckily it worked. 

The ale needs to ferment in the container for around 3 days (more if it's slightly cold), around 20oC is ideal for fermentation, before filtering into sterilised plastic bottles.  It's easy to tell if fermentation is happening because tiny bubbles are visible rising up through the liquid.

Final tip #4, is to squeeze the plastic bottles slightly before screwing the lids on and then leave to ferment in the warm for another day or so. When the bottles have filled out again, there is enough gas in the bottles to make a nice fizzy drink and your fermentation is done!

Drink within 1 week.

The following recipe makes ~15 pints

16 oz / 450 grams young dandelion plants
 2 lb / 900 grams brown sugar (I've seen recipe's specify demerara, we used light muscovado, but see post-tasting notes below)
1/1/2 oz / 50 grams root ginger (again, see post-tasting feedback)
2 large lemons
15 pints / 2 gallon water
2 oz / 50 grams cream of tartar
1/2 oz / 20 grams brewer's yeast (bought online- not the same as bread yeast which was news to me)


The Tasting

Well it bubbled away slowly in the fermenting container from Sunday afternoon until Thursday evening.  I then filtered and bottled the resulting concoction and left it in the airing cupboard overnight to continue fermenting in the bottles.  Fermentation was clearly still happening more enthusiastically than I realised (there were no obvious bubbles) because on Friday morning I had to release some of the gas from the on-the-point-of-exploding bottles.

I decided to take a bottle into work for people to test.  There was some initial scepticism when they heard I hadn't tried it myself but lunch saw the first tentative tastings. 

The general consensus was 'not bad', which I'm going to take as a win for my first ever try.

Useful feedback included - Demerara would have better than muscovado, as the taste of this sugar came through quite strongly.   More ginger would have been better.

Another interesting suggestion was that it would benefit from a few fresh mint leaves in the glass, which is definitely something I'm going to try.

Personally, I like it, which is a relief since we've got 4 large bottles to get through!


Sunday, 26 April 2015

Digging for victory (and cabbages)

Like most people who have flirted with back garden veg growing, Ian and I thought it was pretty easy.  Grow seedlings on a windowsill for a few weeks, plant in a suitable patch of earth, and wait for the rewards.  OK so my one and only potato harvest produced potatoes the size of small marbles and my broccoli plants were eaten by slugs, but even so I felt that I had the principle pretty much nailed.

What we hadn't considered were the problems that arise from scaling up; faffing around with a few plants in the back garden is all very well but on the farm we need to grow sufficient crops to keep 20 families in veg boxes.  This also means that a laissez faire attitude just won't do, as people's tolerance for pea-sized potatoes and holey leaves tends to wane quite quickly when faced with the prospect of actually making a meal from it every week.

On Saturday we were tasked with the job of planting out the cabbage seedlings from the polytunnel. The instructions were deceptively simple.  First, the vegetable beds, (which we had given a first digging over by hand a few weeks' ago), needed to be given a once-over with the rotovator - basically like a lawnmower but with rotating spokes underneath to break the soil into fine pieces (if I have been listening to The Archers closely enough, I think the correct terminology is a 'fine tilth'), followed by a second going over to incorporate a load of fertiliser from the closest compost heap.  After this, the weed barrier needed replacing and slits made for pushing the plants through, and finally, once the plants were all in the ground, the entire bed needed covering with a fine mesh to prevent cabbage white butterflies from laying their eggs all over our tasty young cabbage leaves.

We thought this all sounded very easy,  maybe we could potter around with the vegetables in the morning and then take on a 'proper task' in the afternoon.

However, it quickly became apparent that far from being 'pretty easy' planting out cabbages, particularly in the clay-heavy soil of the farm, was going to be backbreaking work.

The rotovator, much lauded labor-saver, found it almost impossible to break up the clods of earth, which had set like rock (or more likely, clay) after weeks of dry weather.  It was heavy, it was uncontrollable and on several occasions it gave up completely.  It was only at this point that Ben, who owns the farm, let us know that his pet name for it was 'the green gym' due to the total body workout that comes from using it.

The weed barrier was a nightmare to cut, refusing to yield to the penknife unless held taught,
Mr Rotovator
something that was pretty much impossible given its size and the uneven surface beneath.

Even transporting the cabbage plants from the polytunnel to the beds was unexpectedly time consuming.  The polytunnel is situated at one end of the veg beds, the designated cabbage beds at the other.  The small cabbage plants were in 10cm pots with around 8 pots to a seed tray.  A flimsy, wobbly seed tray that meant carrying two of them at once was guaranteed to result in accidentally tipping out several small plants.  We moved over 60 plants over many, many trips.

Ditto water.  Due to the dry weather, the only full water buts were located by the polytunnel.  I reckon each bed received at least 6 watering can's worth.

We were also tripped up by the logistics of getting each plant into the ground through the slit in the weed barrier.  For plants located near the edges of the bed we could cheat, lifting the weed barrier to dig the hole and add a handful of fish and bone meal, before replacing the barrier and dropping the plant into the hole.  But for plants in the centre of the bed, we needed to do all the digging through the slit.  It was difficult to get enough earth out to leave space for the plant and this was made all the more difficult by not really being able to see what we were doing.

Although this all sounds quite negative - it was certainly difficult work - but the sun was out, the day was warm and we had over six hours until we needed to go home.  Finally, towards the very end of those six hours we were able to stand back and look at several magnificent beds of cabbages. 

We also harvested lots of lovely rhubarb for the first veg boxes of the year, which this showed us that our hard work would actually lead to some tasty rewards.
And if I see a cabbage white butterfly fluttering anywhere near my lovely cabbages, I've got a water pistol and I'm not afraid to use it!